Topicality? Just Imagine!
Vocational Students with a Hunger for Topicality

Introduction
Vocational students, enthusiasm and topicality combined? Impossible according to clichés. What students they can choose the topical items focused on in class? What if we provide tailor-made support for them? It was the challenge of one of the Teacher Design Teams of the Tablio Project of the PXL University College. It led to the multimedial topicality project ‘Actualiteit? Beeld je in!’ (‘Topicality? Just Imagine!’).

Figure 1: Project logo.
Tablio
The topicality project has been developed in context of the Tablio research project of the PXL (Hasselt). Tablio is a practical research project into the constructive use of tablets in education. The research project started in 2012. After developing, testing and finetuning a number of ready-to-use tablet implementations it became clear that tablets have a lot of potential to tackle the students’ differences in learning. The main focus of the project shifted to personalised learning and differentiation. Tablio developed a didactical frame, analysing available good practices and zooming in on hiatuses. The expertise and good practices were shared by a MOOC . In 2017 Tablio started an international cooperation in view of an Erasmus+ project . This cooperation composed two Teacher Team Designs in six European countries. The Teacher Design Team enables researchers, teachers and teacher-training students to work together on a specific need of a particular school.

Figure 2 logo Tablio
The Teacher Design Team of the ‘Topicality? Just imagine in!’ project consists of Hanne Rosius (Project General Subjects course didactic and researcher at PXL in Hasselt), Axelle Bollen (student Bachelor Secondary Education at PXL), and Myriam Bortels (Project General Subjects teacher at HAST School). Teacher-training students Eef Vanderstraeten, Alexander Kalebka (PXL), and teacher Mieke Magchiels (HAST School) helped with the testing and refining. The subject Project General Subjects has a thematical approach. However, teachers noticed the difference in students’ enthusiasm for certain themes. The Project General Subjects curriculum mainly dictates functional skills. The openness of the curriculum leads to a broad scope to choose subjects in order to be combined with functional skills. It is possible, in theory, to let students participate in the choice of course subjects. Teachers however doubt whether students possess enough self-guiding skills to take their learning into their own hands. Nevertheless, independence is the main focus in the Project General Subjects third two-year cycle curriculum. The original research question was ‘Can we give student more autonomy in the Project General Subjects curriculum as to choose the subjects in order to motivate them. Can tablets promote autonomy-aided learning?’ The design was based on the ABC-model: a theory to improve autonomy-aided learning. Three pillars are the foundation of the ABC-model: autonomy, connectiveness and skills. This article will illustrate the ‘Topicality? Just Imagine!’ project by zooming in on these characteristics.
Autonomy: starting from strong images leading to topicality
The Teacher Design Team choose to focus on topicality in order to explore the research question. Topicality is an important subject in the Project General Subjects curriculum. Moreover, it provides legion of opportunities to imbed choice possibilities. The ABC-model even states that the students’ autonomy will be improved by providing a wide range of learning materials for the student to choose from. The Teacher Design Team chose to use strong topical pictures as a stimulant for topicality. A strong image is interesting since it invokes a certain emotion. However, without getting the whole story immediately.

Figure 3: A strong photo shows emotion without revealing the story.
Students are image-driven. Strong photos can invoke students’ questions and therefore interest. Curiosity motivates the students to learn more about the story and thus also the topicality it links to. Figure 3, for example, is a strong image of a calm mother holding her crying infant while faced with armed authorities. A student may be curious and therefore motivated to learn about the refuge crisis in Honduras.
The Teacher Design Team quickly learned that there are more than enough strong images available about topical themes. Most of the vocational students however do not use the channels that provide these images such as quality newspapers or magazines. The Teacher Design Team chose hence to collect the images and post them on their Instagram account (see figure 5). Instagram is a popular app which a lot of the students use. Students can follow the project’s account and will be confronted with and made curious by news items even after school has ended.

Figure 4: Instagram app.
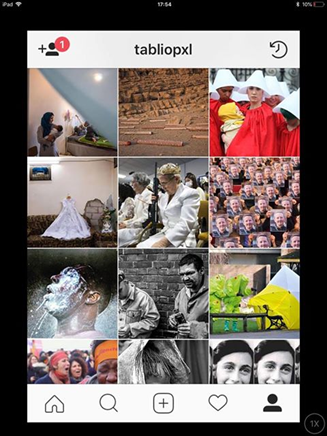
Figure 5: Instagram account 'tablioPXL' with strong images.
Since not all the students have Instagram and since physical presence of pictures in the class is an advantage; the photos will be present in the classroom on a photo display. Students can ‘shop’ in the display for an appealing image. This way the design responds to differences in students’ interest and improves the students’ learning autonomy.
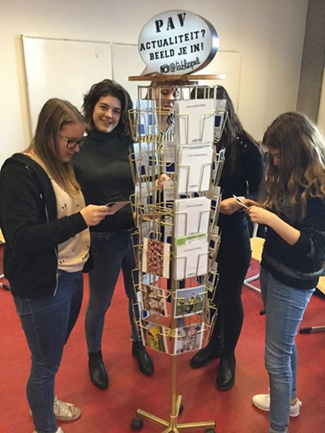
Figure 6: Students choose photos from the photo display..
Skill: from photo to story
A photo is worth a thousand words. After all, every photo holds a topical story. Once students have chosen a photo, they have to look for the deeper story. They should recreate the story and make a video out of it. This should contain the answers to the (W-)questions that function as a reference for these assignments:
- Why did I choose this picture?
- What did I think it was about?
- What is it actually about?
An introduction class provides the students a good foundation to start from. During this class the Teacher Design Teams introduce their picture choice.
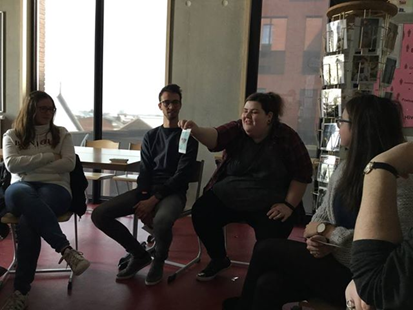
Figure 7: Teacher Design Team members show their picture choice.
Looking for the story behind the picture is not that easy for every student. They have to feel skilled enough to tackle the assignment. In order to achieve this; the topicality display also contains guide cards with QR-codes. These codes lead to websites or apps to help the student work the app, with the search, or with the language. The foundation for this are the so-called OVUR-steps: orientation, preparation, execution and reflection. Step-by-step guidance cards are added to the display.
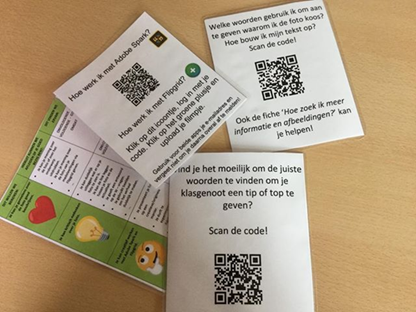
Figure 8: Guidance cards which are added to the photodisplay.
- Orientation: Students conceptualise their assignment. On the back of their picture are keywords to help them get started (see figure 9). These keywords can be used to look up online. Furthermore, students who need extra help can scratch off the patches covering QR-codes (see figure 10). These codes lead to easily accessible sources providing more information on the picture.
- Preparation: Students write down their text and look for extra pictures to clarify their story. To motivate their choice, they can use a vocabulary Padlet (see figure 11). Manuals for finding pictures and references for speaking are available for struggling students.
- Execution: Students record their story in the app Adobe Spark. This enables the student to tell the story using multiple pictures. Afterwards, the movie should be uploaded in Flipgrid. A tutorial video for both apps is available; the photo display contains a QR-code linking to it. Only students who need the extra help use this video.
- Reflection: Students get feedback from their teacher and peers. From this feedback they can derive points for improvement for the next video.
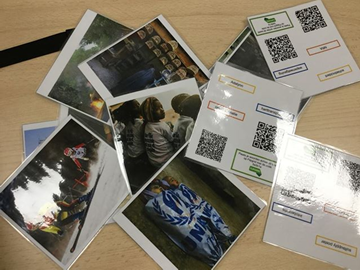
Figure 9: Keywords on the pictures’ back.
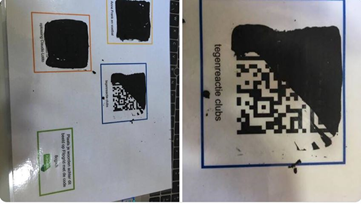
Figure 10: Tailor-made guidance covered underneath a scratch patch.
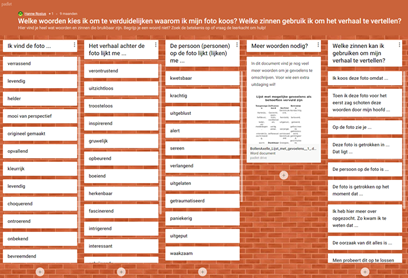
Figure 11: Language guidance in Padlet.
Providing different guidance cards helps to tackle the differences in students’ status. This improves the feeling of being skilled and thus helps each student to work independently within the project.
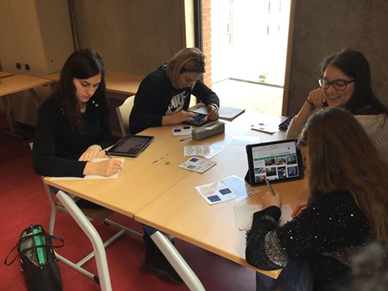
Figure 12: Students looking for the story behind the picture.
Spark Video and Flipgrid?
Students make a video using the app Spark Video after researching the story. This app focuses on animated videos with text or voice-over. Existing pictures can be uploaded and combined into a video with effects, animation and spoken voice-over. Items can be imported from the camera on the smartphone or tablet, or from Lightroom, Google Photos or Facebook. Spark Video is perfectly suited for digital storytelling and fits wonderfully in the project ‘Topicality? Just imagine!’.

Figure 13: Spark Video app.
The students reconstruct the story behind their picture by combining images (cards, important people, places …) in Adobe Voice and recording the explanation. They can choose to only record their voice or to film themselves while telling.
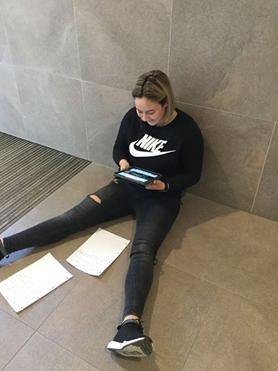
Figure 14: A student recording the story in Adobe Voice.
All of the students’ videos made in Adobe Voice should be collected on one canvas in the app Flipgrid. This is an interesting tool to engage students and formatively evaluate them. The idea is simple: a teacher poses a short, written question. Students can answer with a video of which the teacher decides the length. All videos are combined in a type of grid. This is visually and stimulates the students to see the answers of the peers.

Figure 15: Flipgrid app.
The tool, online or app, is quite easy. After registration, grids and questions can be created. The free account allows grids to be made. These grids function as digital classrooms in which questions can be posed. The number of questions and responses (namely students’ videos) is unlimited. Different evaluation criteria can be linked to each grid. In addition, every student or teacher can respond to a video with a video.
Every question generates a URL or QR-code for students to react directly. Teachers can secure the question with a password or choose to moderate the videos before publishing.
It is even simpler for students: they do not need an account. They can click the link, log in using the code, click the plus sign, provide access to microphone and webcam and take a webcam picture as identification. Afterwards they can listen repeatedly to the recording. When satisfied they can submit their video message.
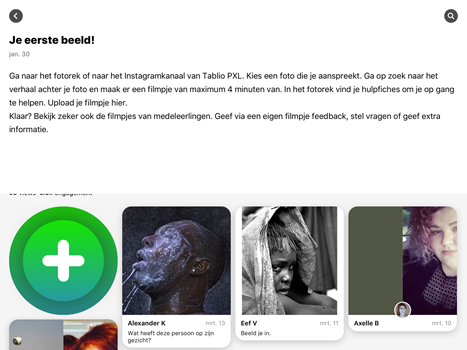
Figure 16: Different topical stories collected in Flipgrid.
By collecting the project’s videos in Flipgrid students can take a look at each other’s work and derive more topical information about different topical items.
Connectivity: sharing stories and feedforward
To provide the students a feeling of connectivity, they will have coaching conversations. All students work on a video during the first two classes thus to get to know the assignment with guidance. They work on the second photo without more help.
The Flipgrid evaluation system is used to provide feedback on the following criteria:
- motivation of the picture choice,
- story behind the picture,
- language
- work ethic
- creativity
These criteria are explained on an evaluation card hanging on the picture display.
The teacher fills in the evaluation system. It focusses on the good parts and formulates a point of improvement for the next photo.
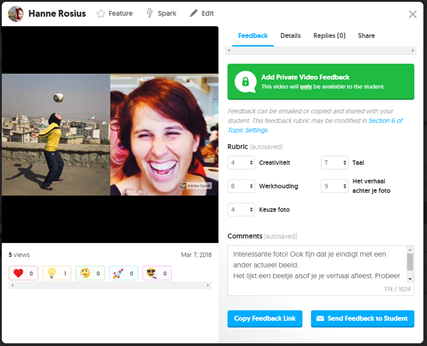
Figure 17: Evaluation criteria for feedforward in Flipgrid.
The Flipgrid app enables to react on other people’s video with a video immediately posted underneath the original video in the shape of a small point to click on. The Teacher Design Team chose to use the video response function for peer assessment. Students give each other a concrete top (what went well) and a hint (what can be better next time). Consequently, students can grow in summarizing topical items. The top and hint system protects the safe assessing atmosphere.
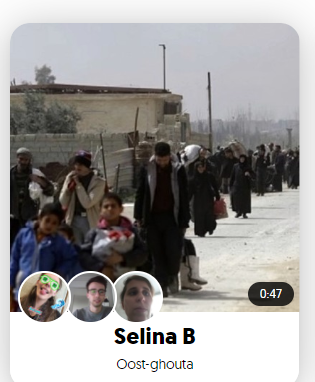
Figure 18: Video with three video responses.
Findings
The HAST School’s students were asked to help reflect on the quality of the ‘Topicality? Just Imagine!’ project during the test period.
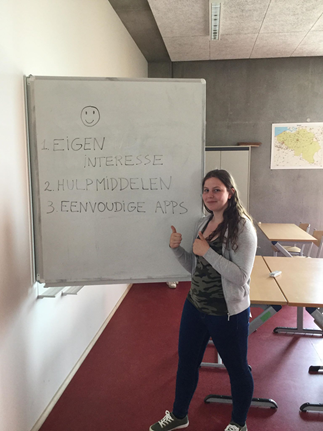
Figure 19: The project’s strengths according by students after first testing.
Teachers and students are enthusiastic about the working method. Students especially appreciate the room for their own interest. They experience the pictures as being stimulating and have no problem with finding a photo that interests them. Some students even look for extra images for the project.
In addition, students acknowledge the usefulness of the wide range of aids for language, search process and apps. They also like the choice whether to use the extra guides or not. They feel encouraged and skilled enough to tackle the assignment.
Furthermore, both the students as the teachers believe the apps to be user-friendly. Students learned quickly how to use the app. No practical problems came up.
The testing phase also led to points of improvement. The students helped the Teacher Design Team to discover these.
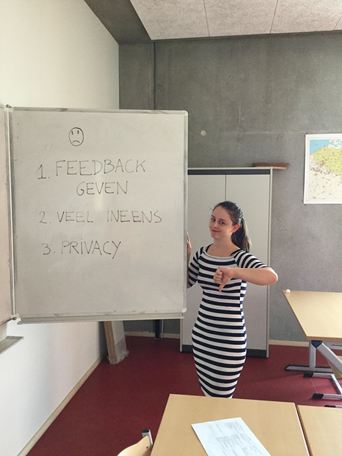
Figure 20: The project’s points of improvement according by students after first testing.
Students often had difficulties with giving feedback to their peers. Especially finding the right words to tell their peers clearly and respectfully how to improve. The Teacher Design Team thus added an extra guide card with QR-code to the picture display. This code leads to a Padlet with clear-cut criteria and sentences for both tops and hints (see figure 21).
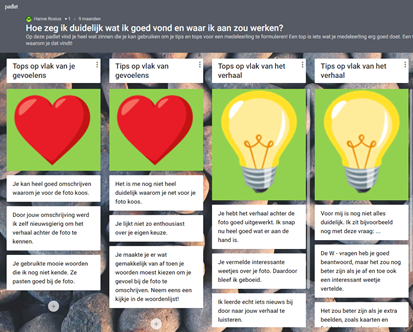
Figure 21: Guidance in Padlet for giving peer feedback.
Next, students perceived the project’s scope as being too wide and needed a synthesis action plan to look back at. This was added as well.
Lastly, students were worried about their e-privacy, especially who could see their videos. They pay great importance to a safe digital environment. The new European privacy legislation of 25 May 2018 also forced the Teacher Design Team to keep this in mind. The GDPR (General Data Protection Regulation) handles the storing and securing of personal data of European citizens. Thus, including the students. The used platforms were hence secured with codes to ensure the content to be only seen in classroom context.
The future
The result was received well by students and teachers. The project based on the ABC-approach turns vocational students into students eager to learn and skilled to do this autonomously. Both the HAST School as PXL will imbed the design in their curriculum. The design will be shared further during a Tablio bootcamp and workshops during the PXL Congress. For further development, check the Tablio Facebook page, #Tablio or @RosiusHanne on Twitter.
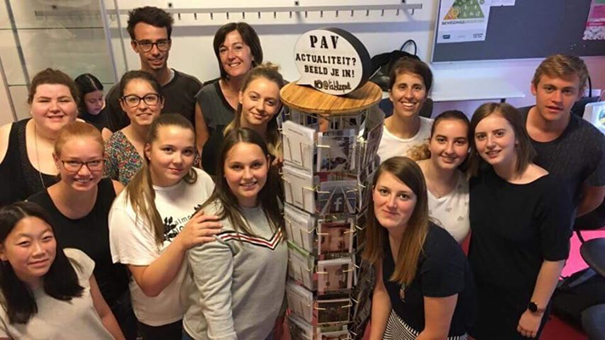
Figure 22: Some of the students and Teacher Design Team members.